A couple of years ago my house flooded and after that I decided that I needed to build a system that would prevent this from happening again. I decided to build a leak sensor system that would automatically shut off the water if a leak was detected. I used a distributed network of leak sensors that would communicate with a Raspberry Pi over MQTT. The Raspberry Pi would then send a signal to a smart valve that would shut off the water mains.
A Leak Sensor System that Saved my House from a Flood
The system I built actually came into action during last winter. The cold weather caused a pipe to burst in my basement, but one of the leak sensors detected the water and shut off the water mains. This was able to prevent a lot of damage to the house and proved that the system worked.
The Software Side
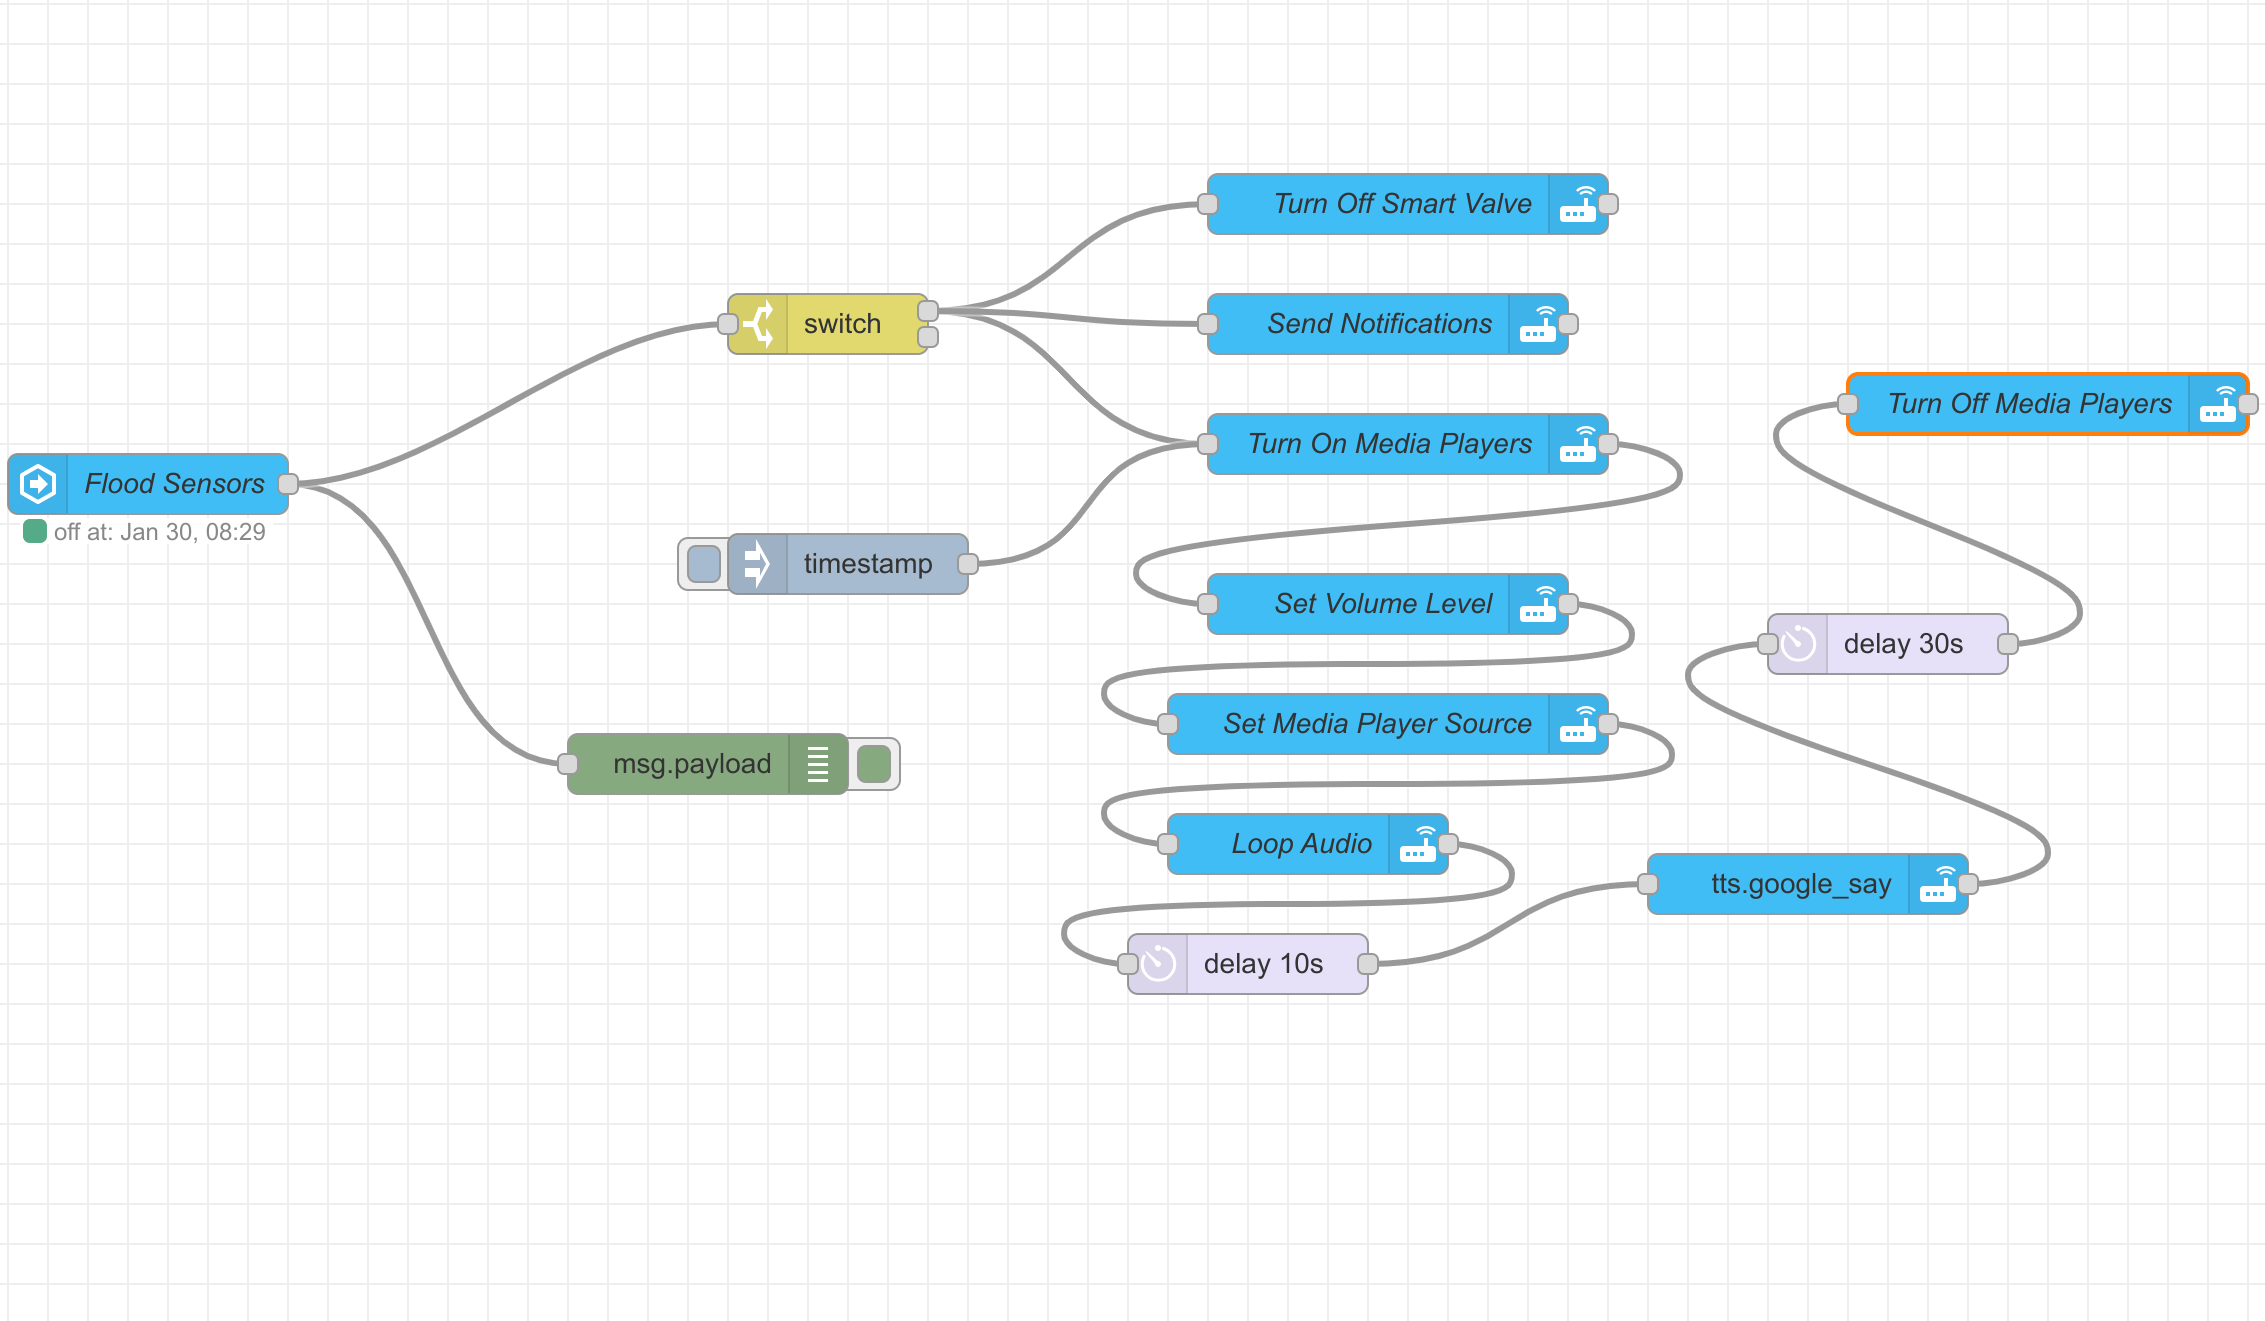
The software side of the project was designed to be as simple as possible to ensure that it would be reliable. I have multiple flood sensors that use the ESP8266 chip and update their status over MQTT to a raspberry pi. For the smart valve, that also listens to the MQTT server and can be toggled by the raspberry pi. This toggle is controlled by a Node-Red flow that listens to the MQTT server and responds to the data. If a flood sensor detects water, the Node-Red flow sends a signal to the smart valve to shut off the water.
Hardware Modifications
I actually had to modify the smart valve to make it work with my system. The original smart valve used a proprietary protocol called Tuya. I didn’t like this as it meant that it would be communicating with a random server. This would add extra latency and would fail if the internet died. Adding a second point of failure to a system that is supposed to prevent a flood is not a good idea. I was able to flash the firmware with an open-source firmware called Tasmota. I did this by opening the smart valve and soldering wires to the TX and RX pins and shorting the reset pin to ground to get it into flash mode. This allowed me to integrate the smart valve with Home Assistant through my MQTT server. idea. I was able to flash the firmware with an open-source firmware called Tasmota. I did this by opening the smart valve and soldering wires to the TX and RX pins and shorting the reset pin to ground to get it into flash mode. This allowed me to integrate the smart valve with Home Assistant through my MQTT server.
Using previous technologies
One key point that helped me complete this project quickly is that I had already set up a MQTT server for my Air Quality Monitoring Project. This meant that I could reuse the infrastructure that I had already set up. This is one of the reasons why I love using MQTT, it’s so easy to set up and it’s so easy to add new devices to the network.
Software Utilized
Comments (...)
Loading comments...
Leave a Comment
Could not post comment. Please check your inputs.