A CAD Model of a Vice
It all started when I was asked to design a vice for a machining project. I created a unique design that was able to be machined easily with the tools we had available. It also had one killer feature which let the user adjust the vice to switch between clamping pressure and speed.
The Design Steps
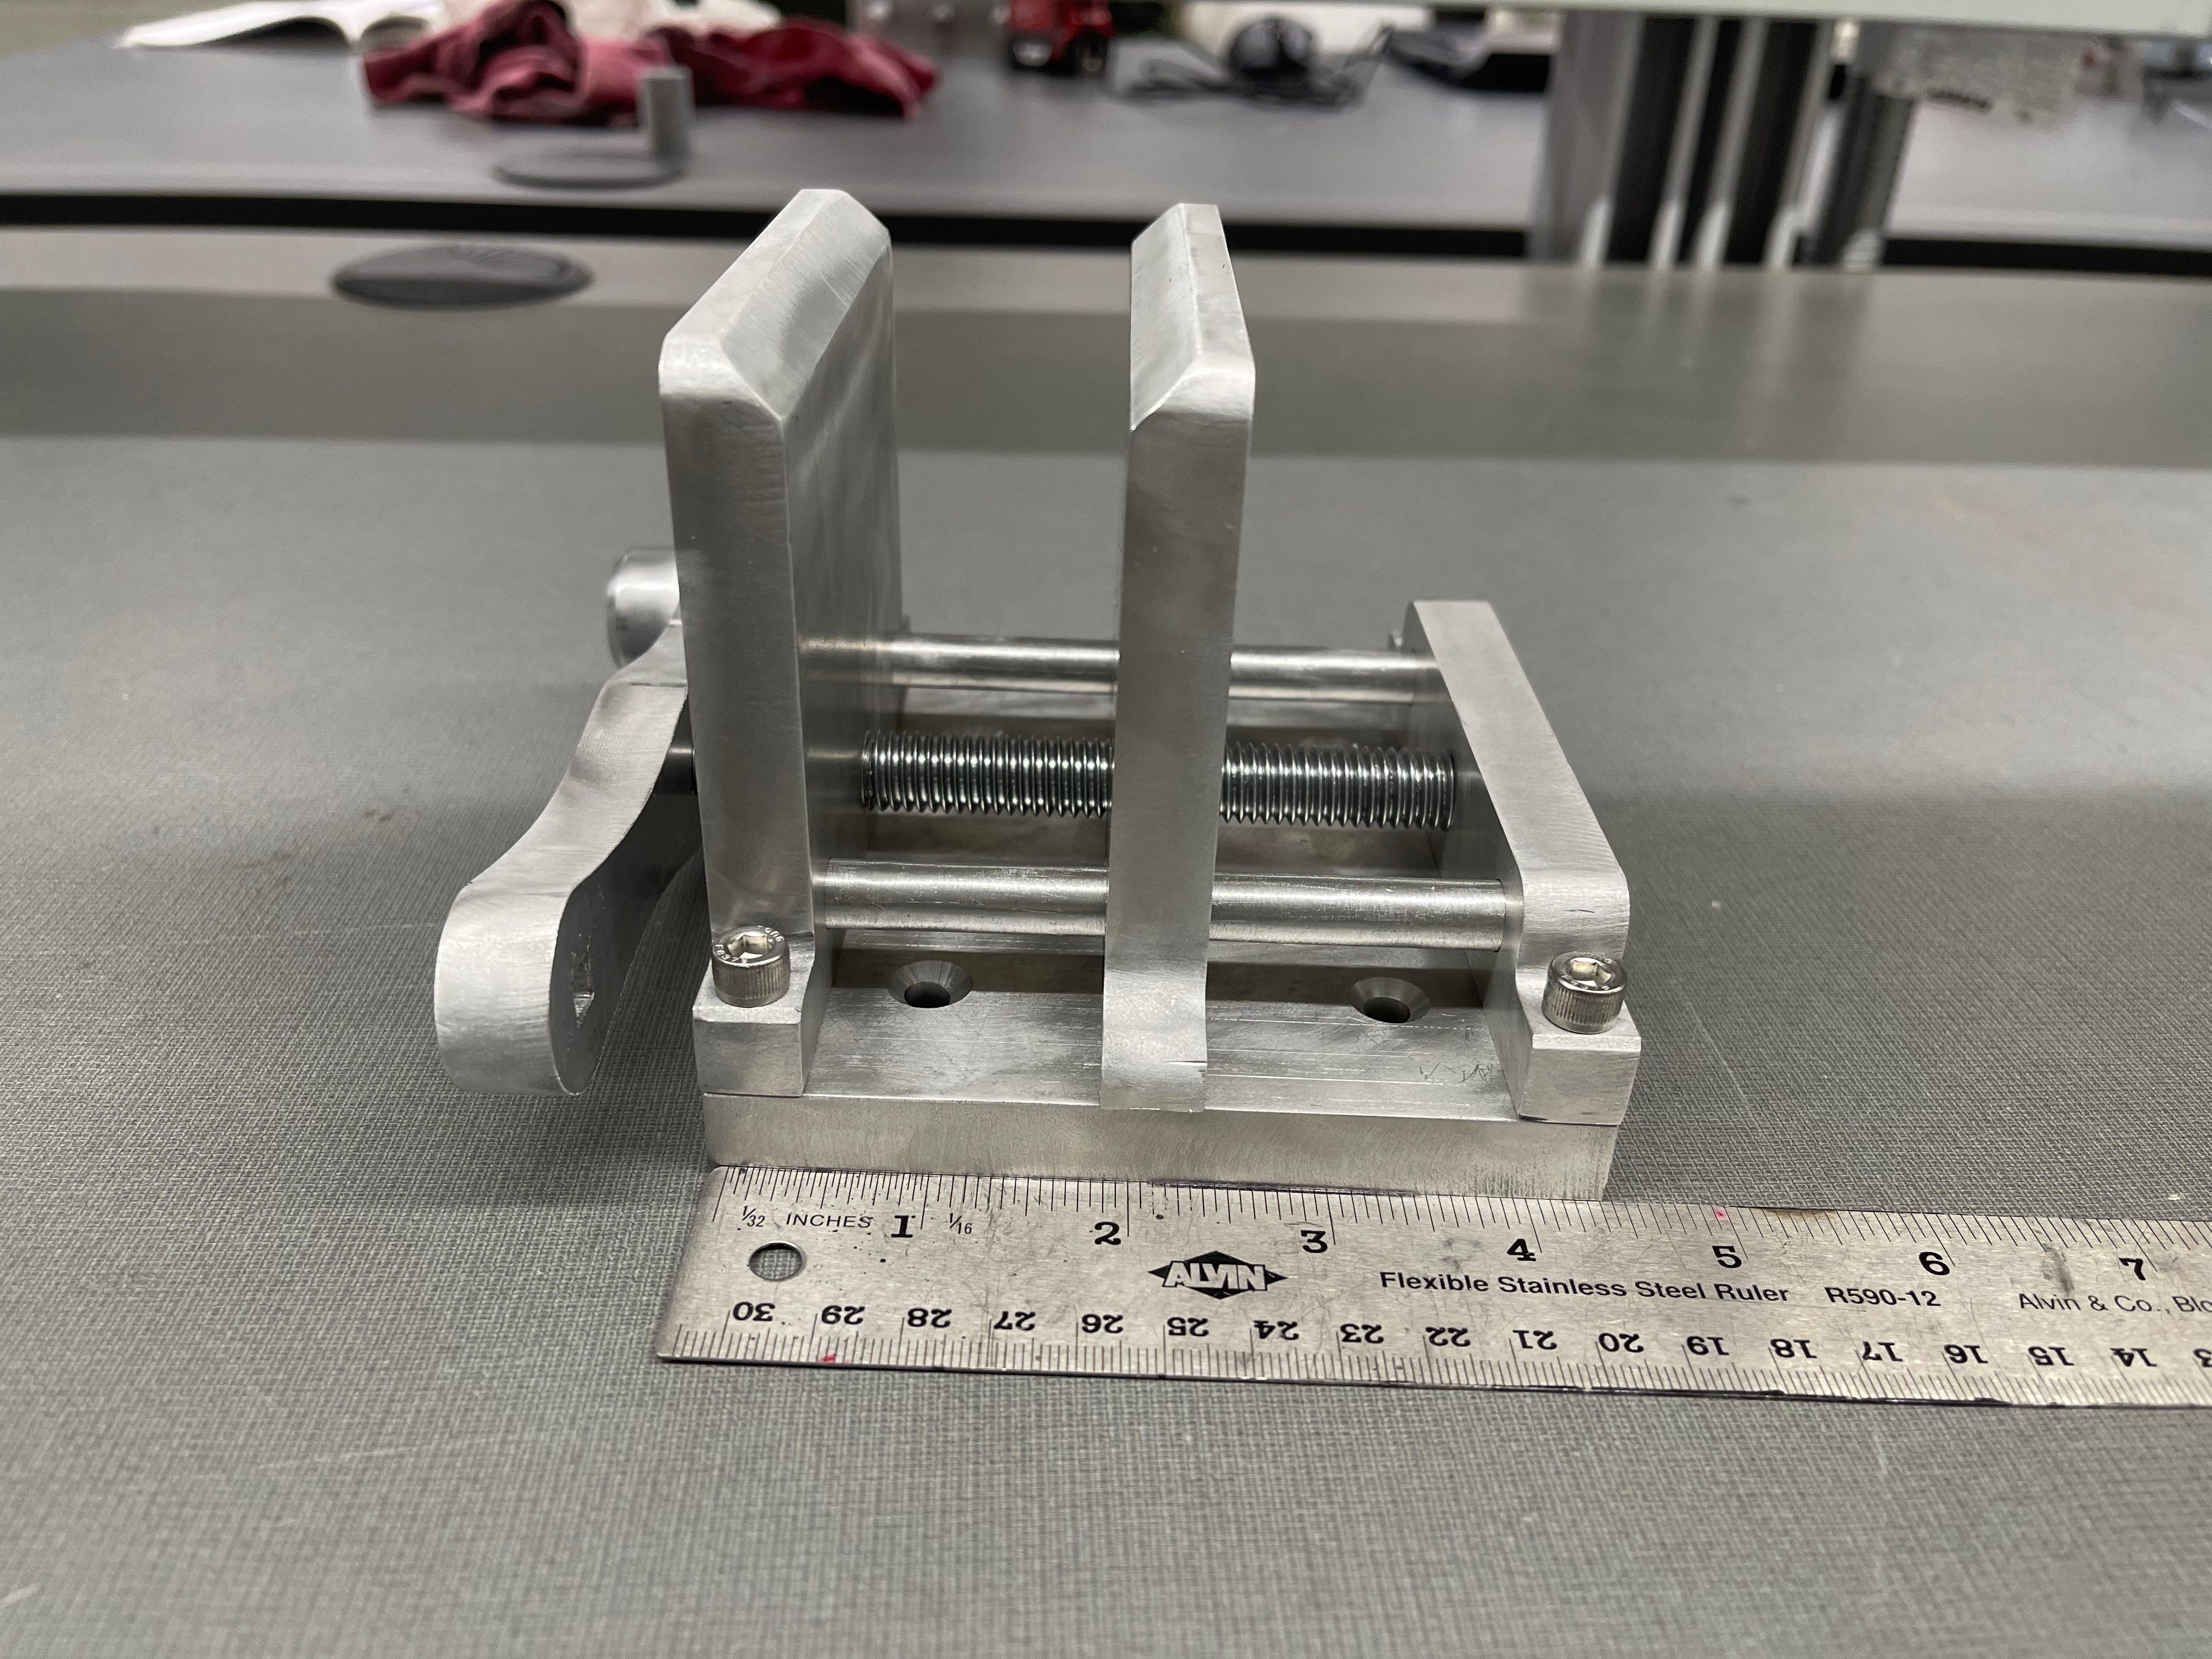
When I started the design I had to consider the tools we had available. I knew we had a waterjet cutter available so I designed the vice with the most amount of pieces that could be cut with the waterjet. Almost every part of the vice was waterjet cut including the base, the jaws, and the handle.
I also used the waterjet cutter to mark the locations for the holes that would be drilled. This was a great way to ensure that the holes were in the correct location. The waterjet was also used to cut square holes for the handle which let you adjust the vice to switch between clamping pressure and speed.
The Machining
Once our parts where cut we added chamfers to the edges of the jaws to allow for easier insertion of the workpiece. We also drilled and tapped the holes for the screws that would hold the vice together.
Improvements
The one thing I would like to improve on this project is the base. The mounting holes are underneith the mounting rods which makes it difficult to mount the vice to a table without first disassembling the vice. In a future design I would move the mounting holes to the side of the base so that the vice could be mounted without disassembly.
Software Utilized
Comments (...)
Loading comments...
Leave a Comment
Could not post comment. Please check your inputs.