The Challenge: A Need for Longer AUV Missions
Autonomous Underwater Vehicles (AUVs) are vital for ocean mapping and environmental monitoring, but their mission duration is severely limited by battery capacity. Typically, an AUV must be retrieved to manually replace or recharge its batteries, which is a time-consuming, expensive, and potentially hazardous process for operators.
The objective of this capstone project was to design and build a hands-free, autonomous docking and recharging system for the UBCO Marine Robotics Club. The system needed to transfer up to 200 W of power with an efficiency of at least 60%, operate safely in a marine environment, and completely eliminate human intervention. My specific role centered on electrical integration, power electronics design, and programming the charging subsystems.
Iterative Design: From Concept to Reality
Designing a high-power electrical system for a completely submerged vehicle required rigorous validation and several critical pivots.
1. Power Transfer: Conductive vs. Wireless
Initially, we evaluated direct-contact conductive charging due to its high efficiency. However, to eliminate exposed electrical contacts and mitigate the risks of short-circuiting and corrosion in seawater, we pivoted to an inductive wireless power transfer (WPT) system.
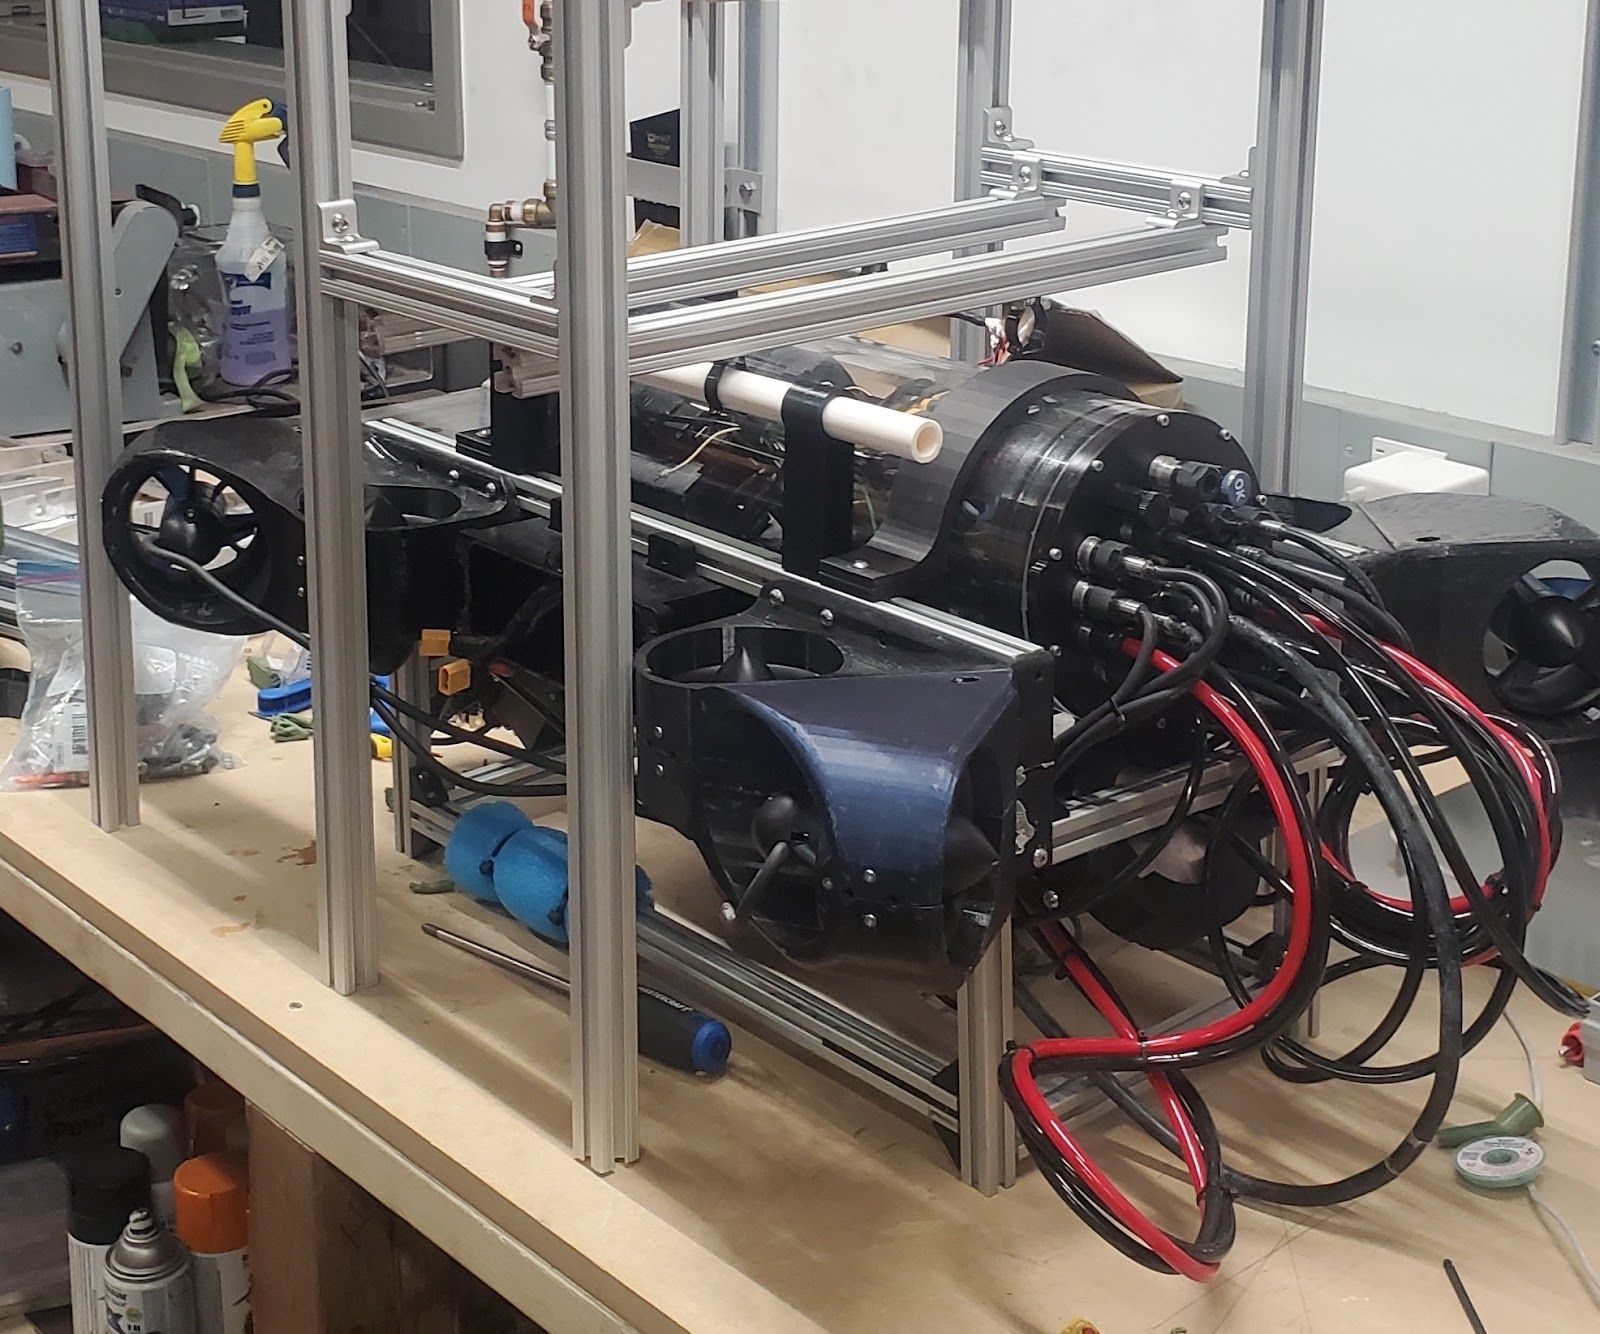
Our initial low-fidelity tests using an oscilloscope and transmit/receive coils revealed a massive 93% power loss through the AUV’s original aluminum hull.
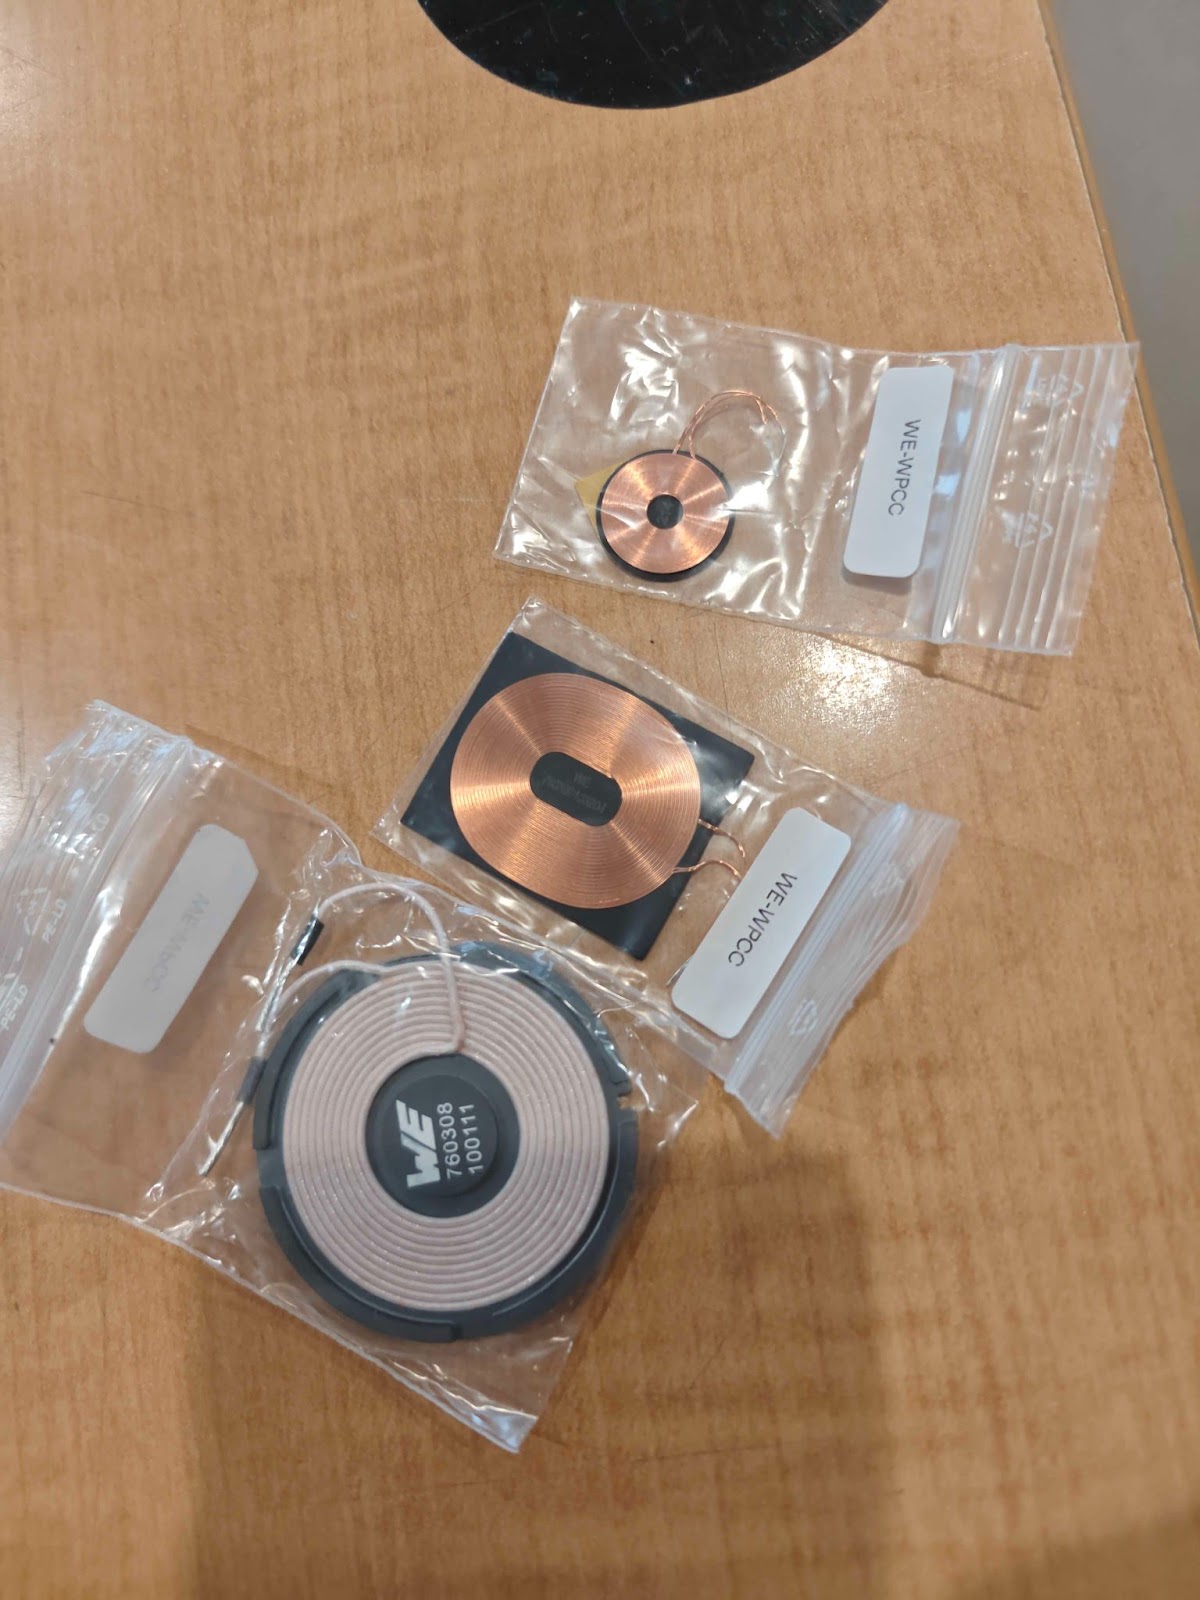
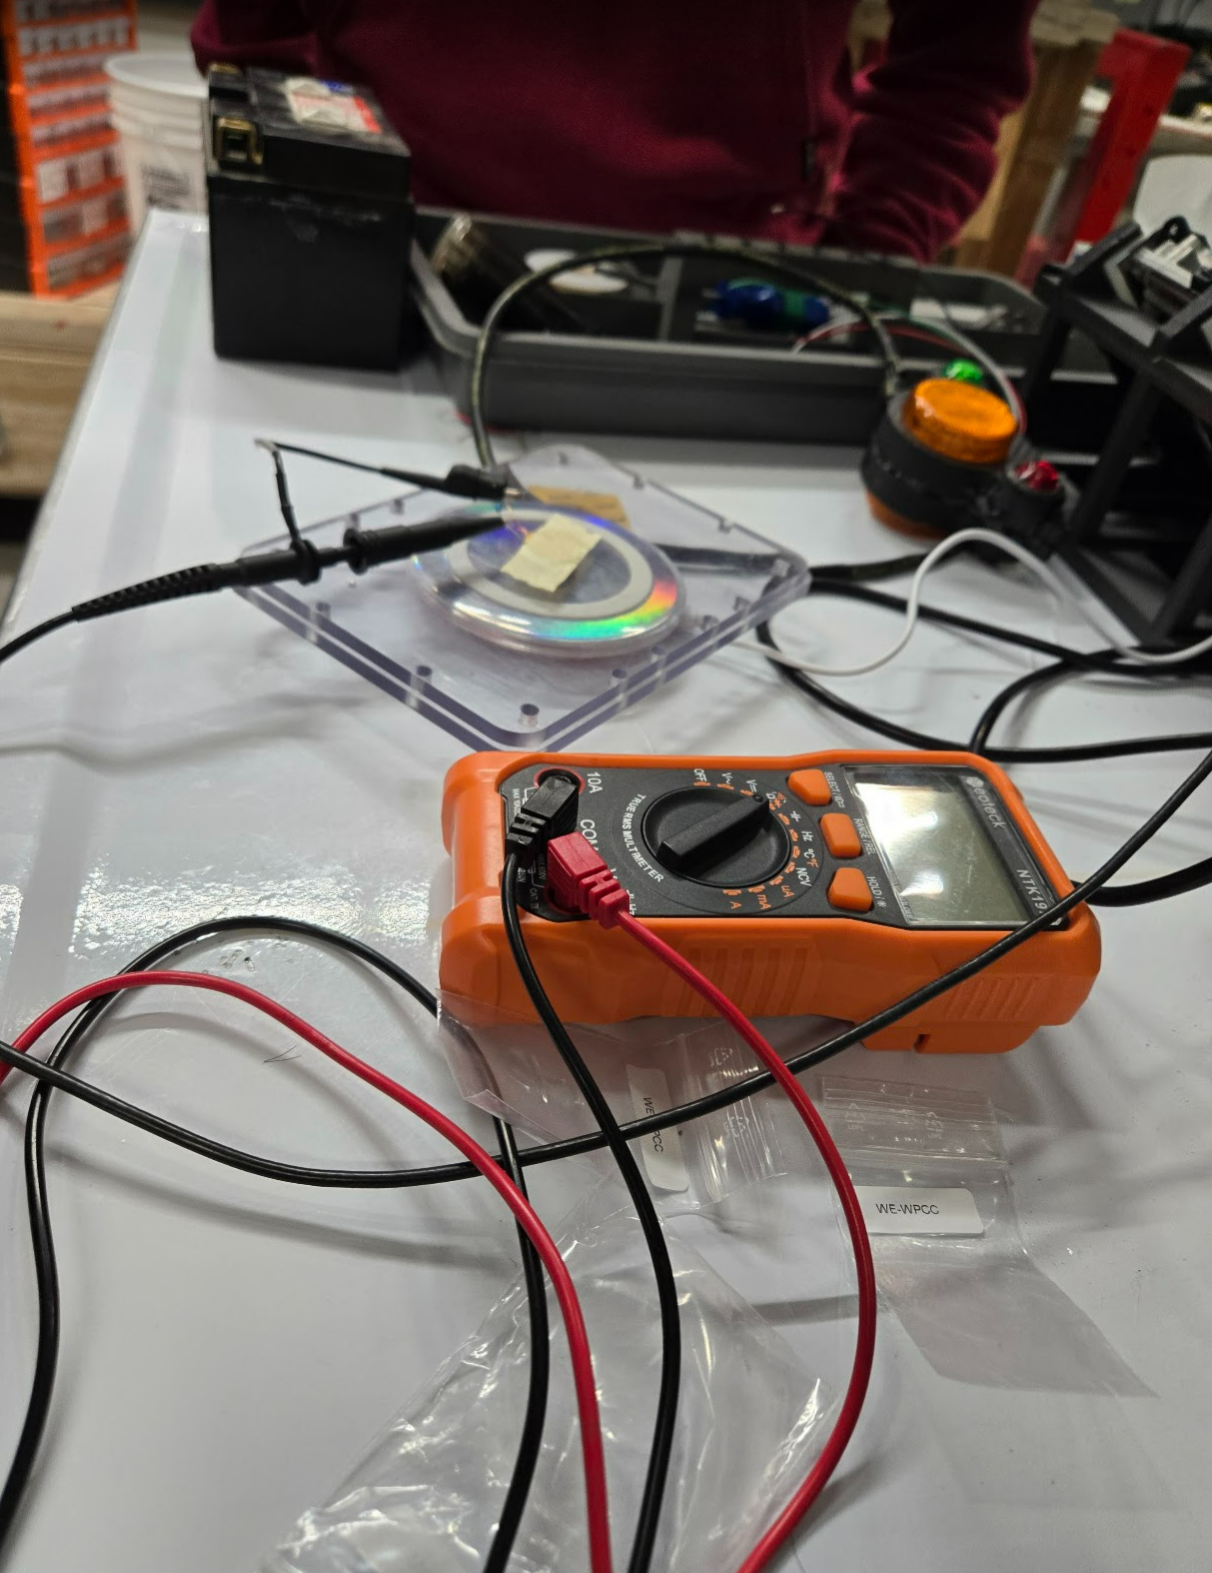
Left: Iterative coil selection to optimize magnetic coupling. Right: Final bench testing of the wireless power transfer coils, revealing attenuation through our AUV’s acrylic battery hull lid.
To solve this, we optimized the system to operate as a high-frequency RLC tank circuit, tuning the resonant frequency of the coils to significantly improve magnetic coupling through the non-conductive barrier.
2. Battery Management System (BMS) Evolution
Safely charging high-capacity lithium-ion batteries requires strict fault detection for voltage and temperature anomalies. I initially designed a custom 6-layer BMS board intended to handle 1 kW loads and 60 Amps.
However, the custom board cut into our tight prototyping budget of 1000 CAD. We quickly adapted by sourcing a commercial BMS that featured active cell balancing (up to 1000 mA), which actually improved thermal efficiency by transferring excess cell energy rather than burning it off as heat. This BMS was also much more affordable than our custom design.
3. Custom Charge Controller Design
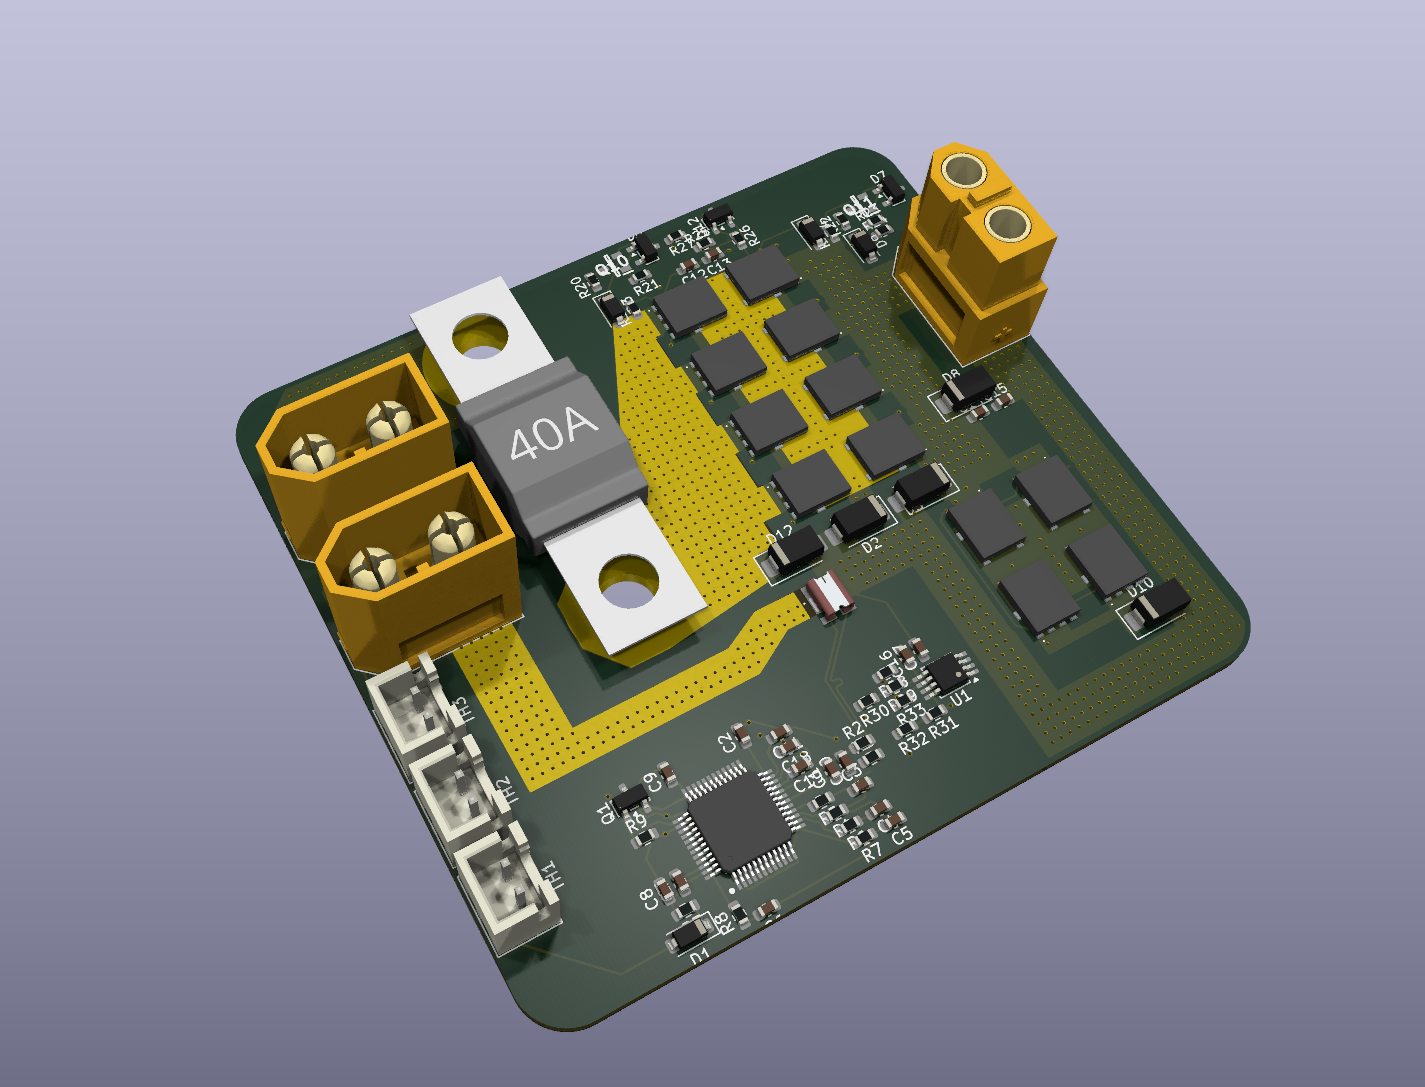
To manage power delivery from varied sources (including an optional 100 W solar panel and the WPT system), I developed the PCB for the custom battery charging board.
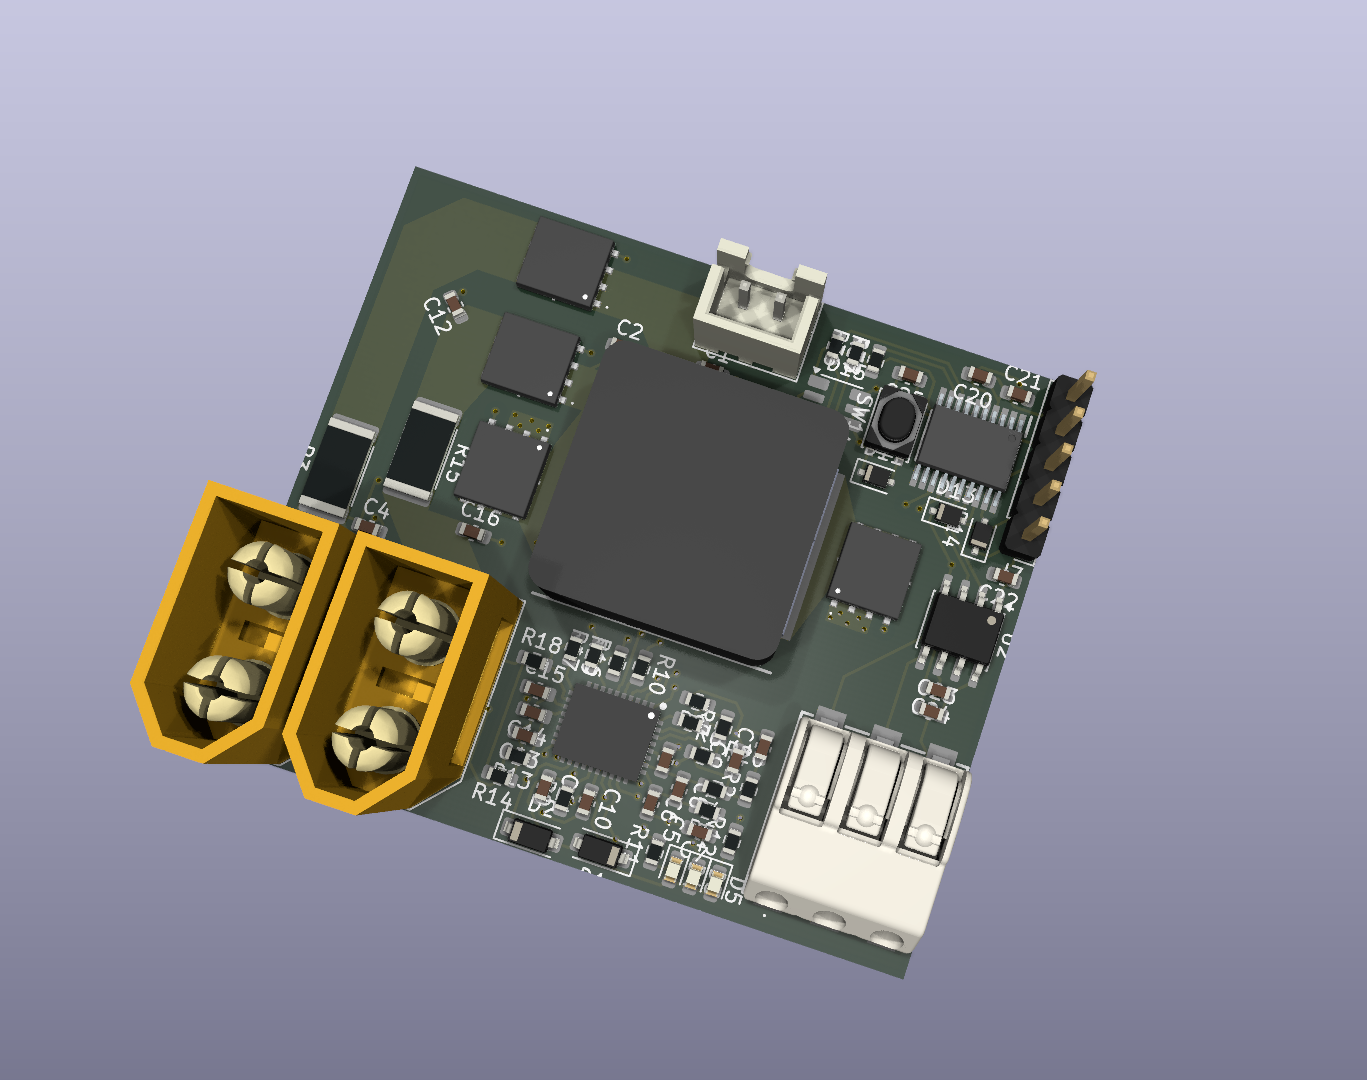
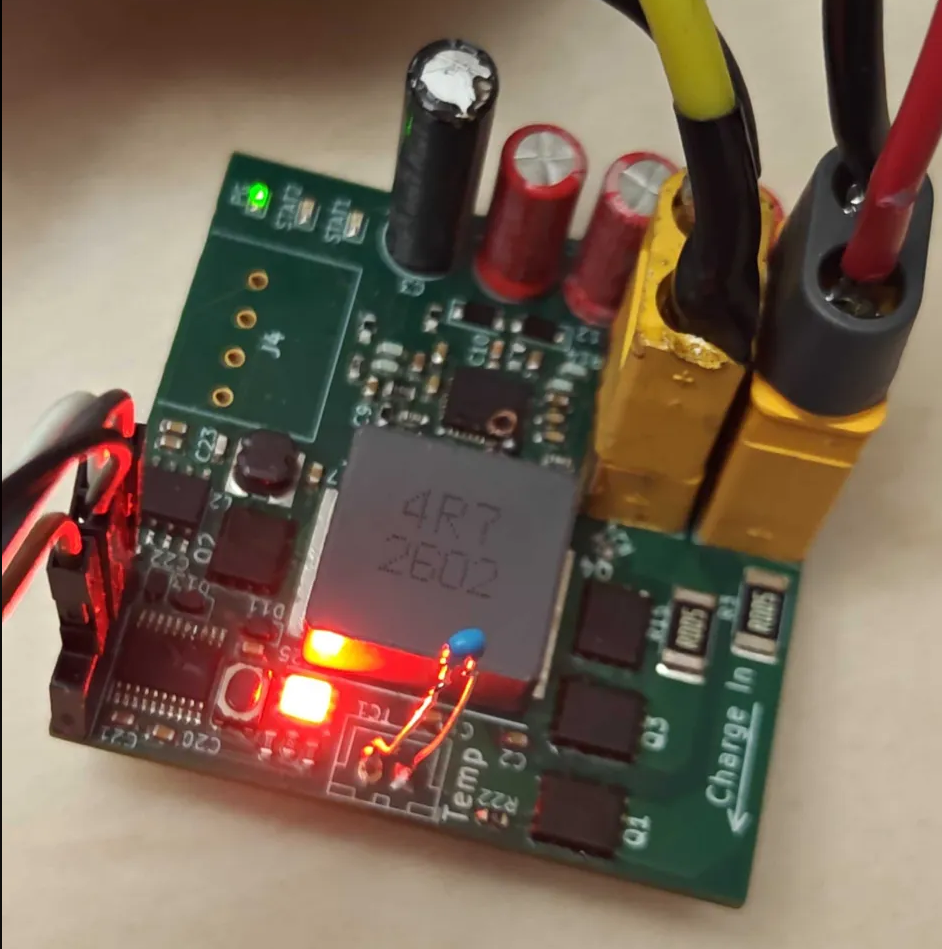
Caption: The completed custom charge controller board, designed to robustly handle power variability from the wireless receiver while providing visual status and safety features.
The software architecture was built using PlatformIO with a FreeRTOS backbone. This operating system choice allowed us to schedule multiple simultaneous tasks safely; if a monitoring task faulted, critical safety cutoffs could still execute independently.
Have a look at my final code on GitHub.
The Result: A Functional Solution
The final prototype successfully achieved a fully sealed, contactless energy transfer system. We measured a coil transfer efficiency of 77.7%, delivering up to 65 W of power to the AUV.
Key Engineering Metrics:
- Transfer Efficiency: 60-78% overall, peaking at 99.3% efficiency across the BMS.
- Durability: The system successfully passed simulated cyclic load testing and achieved 150+ charge cycles without mechanical or electrical failure.
- Thermal Safety: System utilized extremely low drain-source resistance (2.9 mΩ) MOSFETs to keep thermal dissipation down to 410 mW during operation, preventing thermal runaway.
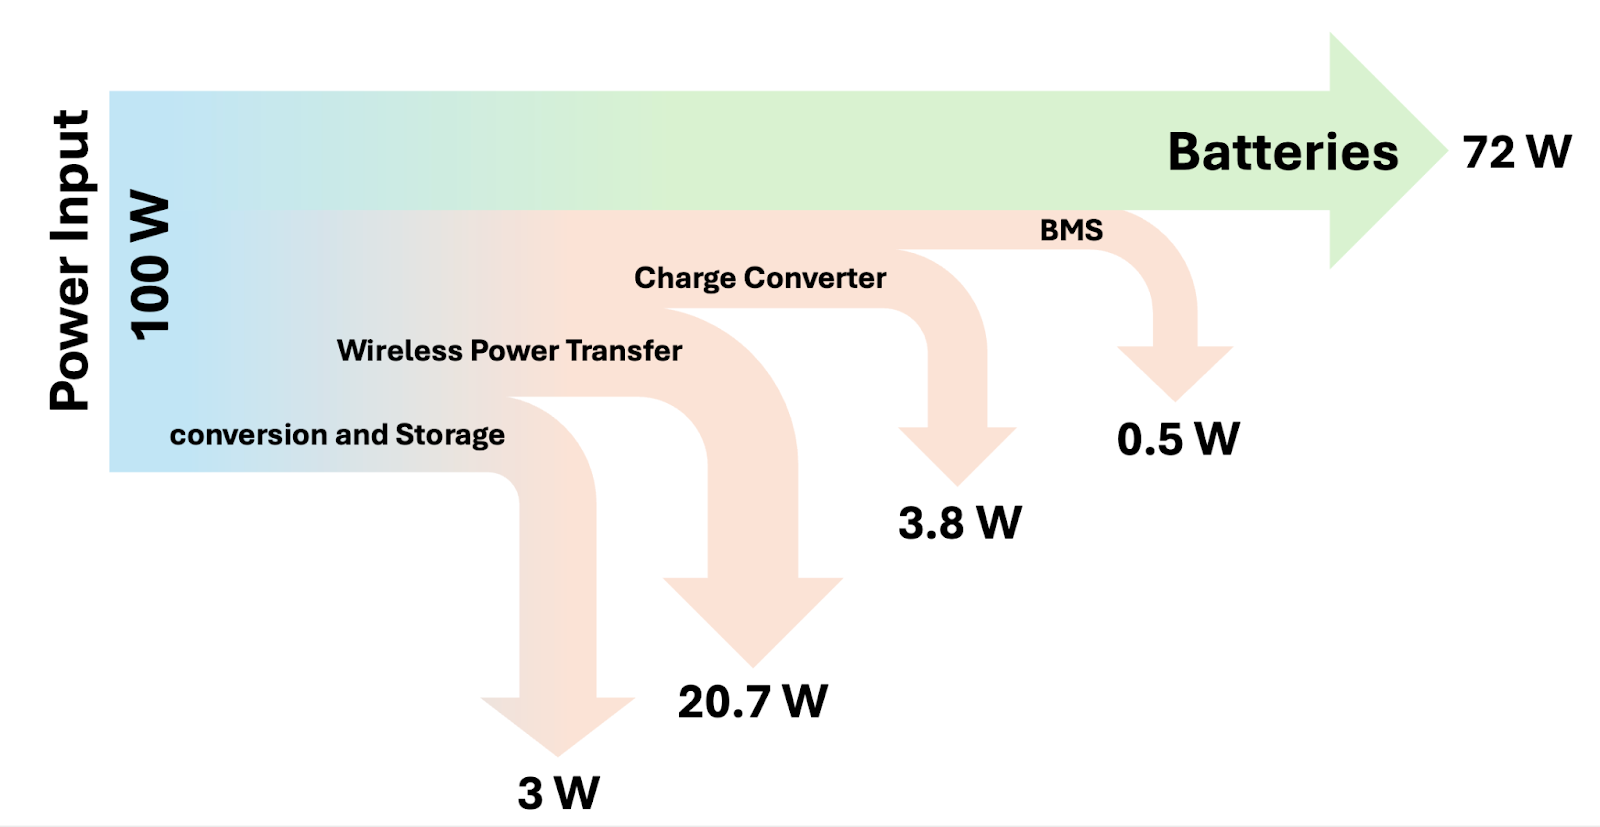 Caption: System power flow diagram detailing conversion losses and the final 72 W output to the battery bank.
Technical Contributions
- Charge Controller Hardware Design: Designed the custom PCB to regulate variable inputs voltage and current to safely charge the battery bank. As well also utilized my knowledge of PCB design to keep footprint small alowing us to utilize a 6 layer stackup for only 2 dollars from JLCPB with the 50x50mm promotion.
- Firmware Design: Designed a robust firmware for our charge controller using FreeRTOS and PlatformIO. This allowed us to visualy monitor the status of the charge controller. The firmware also supported error codes to indicate faults in the system.
- 3D Printing Slicing: Utilized knowledge of 3D printing to best slice the mechanical teams 3D models to ensure the best mechanical properties for the dock.
Reflection & Learning
Interested in the professional growth behind this project? Read my Professional Reflection for insights into the design process and engineering attributes developed during this capstone.
Comments (...)
Loading comments...
Leave a Comment
Could not post comment. Please check your inputs.